I'm not sure whether this is the least interesting game I've run so far, but this may be the first one that has gained zero interests expressed in the missed content in the aftermath.

So, the things that we missed on the playthrough...the earliest ones, of course, involve our initial option to not go via the Affen Forest route. There are certainly legit reasons to avoid that route. It's longer, with more hazards on the way. But I'm inclined to believe that when Waterfield was designing the book, he likely meant for this to be the canon "true path", although technically we can still complete the book without the clues and items gained on that route.
Note that the encounter with the Kraken, Galrin and the spectral army will happen on BOTH routes (since we're still close enough to lake initially no matter which direction we take) so we won't risk missing this vital encounter. Anyway, the first encounter via this route that may give us a minor (inessential) plot token involves a group of Spriggans:
This is just a plain combat encounter, and after we kill a pair of these creatures, we can loot some gold (thus having more to spend on Canches' stock) as well as a Garnet Ring.
Next, there's an encounter with the Wood Elves of Affen Forest that was probably meant to be more important, although like I said earlier, technically missing it doesn't prevent us from finishing the game.
We can choose to reveal ourselves or hide, but if we try the latter, they have a very high chance of finding us anyway (and if we attacked any of them in the attempt they will bring us back as a bound captive). The right way is to let them bring us back to their village anyway, so it's certainly better (and easier) to go with them peacefully. We will be brought to the clan chief and the shaman:
They're not introduced by name, so it's not known whether this particular shaman is also the PC of FF28, Eldenurin (anyway, that book was written later, so probably not). As is usual in these book, being honest when questioned by "good" races like elves is usually the good option, and it's no different here, and we should tell them about our quest. It is relatively more difficult to convince them to help us if we arrived as bound captives, but still possible. The clue that we gain here involves gaining entrance to Vashti's lair. They have a magic mirror (shown in the pic above) which shows a image of us in front of the oak trees, holding 2 objects, one of them being long (the sceptre). It's probably mean to combine with the Bard's clue to help us figure out what to do when we see the oaks, but we were able to figure out that from the Juja's words anyway, so it turned out that the clue wasn't quire as vital as it may seem.
Things may turn violent here too, although that's absolutely not good for the PC if that happens. If the PC isn't tied up and tried to sneak a peek at the mirror, the elves will try to stop us (if we're tied up when we tried that, we simply get sucked into the mirror, which is game over). After we kill the chief and the shaman, we can make off with the mirror. However, this prize doesn't really help us at all, and we look into it at any point, we simply get sucked inside.
We may even accidentally destroy the whole elven village by inadvertently summoning Galrin and army. We have an option to ask the elves for information, and one of the options is to ask about Galrin. The moment we mention his name, however, we summon him (and thus wasting the boon - he wouldn't be able to help us against the Golems later, so this is just a delayed game over). Apparently the spectral army is only good for violence and killing and nothing else (can't summon them to help you build a bridge or something), because the moment they appear, they "raze the village to the ground" without stopping to ask whether that's what you summoned them to do. After that, Galrin even scolds you for summoning them when you don't really need them. As mentioned earlier, wasting Galrin here is a delayed game over, but the book attempts to disguise it as a rewarding encounter by letting you loot not just the mirror, but also a set of magical bow and arrows.
If we tried to offer the mirror to Hever in exchange for the Horn, he recognized it for what it was and correctly guessed that we must have gained it by evil (even if it might have been accidental due to Galrin) means, so he turns the mirror towards us and it sucks us in.
During the short segment where we were trying to find out way in the thick fog, we may encounter a Wight (SK 9 ST12), and killing it gains us a handy +1 magic sword. Arthur doesn't need it with his SKILL 12, of course, but I thought it was a a bit of a pity that a PC with the moniker King Arthur doesn't get a nice shiny magic sword for the book.
As mentioned during the playthrough (although it was in spoiler tags), our helmet might be stolen at Hever's castle if we leave it in our room instead of keeping it with us. The correct thing to do is to wait for Hever to organize help for us to track down the thieves. If we rushed off immediately by ourselves, we find the thieves, but find ourselves outnumbered by 6 Pygmy Orcs.
If we'd waited for Hever's help, we'd be accompanied by 6 of his guards, which are more than enough to help us deal with them. Without their help, it's Game Over unless we have a magical bow to help us even the odds. But as mentioned, the only way to get the bow was to waste Galrin's aid, so again, it'll be just a delayed Game Over in this case. And of course, if we never tracked down the helmet thieves, it's also a delated Game Over, because we won't be able to get the Orb without it.
In that village which we avoided after encountering the animated skeletons...there were actually no more skeletons left if we'd explored further (well, no more animated ones, that is). We actually have found this woman, who's apparently half-mad and talking incoherently:
From the bits and pieces of information we may learn and put together, she's apparently the wife of the Farmer whom Morgana abducted (along with Hever's old Bard and probably 9 other random characters from different classes and professions) to collect the sigils and make the golems. If we show her the Garnet Ring, she becomes more lucid due to recognizing it as her sister's possession (stolen by Spriggans), and gives you some vague information about where the Juja lives. I believe she's only other character besides the dying warrior to mention the Juja, so this is probably meant to be the encounter that prompts us to enter Marsh Vile. Again, technically not vital as a clue, but probably meant to be part of the canon true path by the author.
We also get the option to offer her the jewelled choker that we looted from the skeletons instead. It promptly lives up to its name and chokes her to death.
And that's mostly it for the significant sub-plots, I guess. There are a few more pics here, some of which involving characters that we met, but didn't come across the pics because of the way we encountered or resolved them.
Here's the Hellfire Spirit that was transformed from Kevin Truehand's corpse. We see this pic if we didn't move towards Hever:
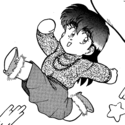
Here's Canches, the trader. We can encounter him on 3 different routes, although none of what he sells is absolutely vita:
And for those of you interested in what a Blackheart looks like, here are 2 of them:\
We may run into their camp during the early part of the book (shortly after the Kraken encounter I believe). We may also find a rope after we kill them, although again, this wasn't a really important item.